Contents
Excel IMAGE Function

When to Use the Excel IMAGE Function in Excel
The IMAGE function in Excel becomes invaluable when you want to seamlessly insert images into cells, directly from a source location. This function is particularly useful for enhancing the visual representation of your data, making it ideal for lists of information such as inventories, games, employee details, and mathematical concepts.
What Excel IMAGE Function Returns
The Excel IMAGE function returns an inserted image into a cell from a specified source location, allowing for enhanced visual representation of data in a spreadsheet.
Syntax of Excel IMAGE Function
The syntax of the Excel IMAGE function is as follows:
=IMAGE(source, [alt_text], [sizing], [height], [width])
Input Arguments
Here are the input arguments for the Excel IMAGE function:
● source: The URL path or file path of the image file, using an “https” protocol. This is a required parameter, and supported file formats include BMP, JPG/JPEG, GIF, TIFF, PNG, ICO, and WEBP (WEBP is unsupported on Web and Android).
● alt_text [optional]: Alternative text describing the image for accessibility.
● sizing [optional]: Specifies the image dimensions. It can take values from 0 to 3.
- 0 – Fit the image inside the cell while keeping its aspect ratio
- 1 – Fill the entire cell with the image, disregarding its aspect ratio
- 2 – Keep the image at its original size, even if it goes beyond the cell’s borders.
- 3 – Adjust the image size according to your preference by specifying height and width.
● height [optional]: The custom height of the image in pixels.
● width [optional]: The custom width of the image in pixels.
Extra Notes
● Excel IMAGE function is exclusively accessible in Microsoft 365’s Excel and Excel for the web. To learn more about how to use Excel for Web for free. Watch 👇 this video
How to Get Microsoft Excel for Free | Free Microsoft Office | Microsoft Office 365
● Images from URLs that require authentication may not render.
● Be cautious when customizing height and width, as it may skew the aspect ratio of the image.
● Redirected URLs are blocked due to security concerns.
● Images stored on OneDrive, SharePoint, and local networks are not compatible.
● To overcome the URL character limit of 255, paste the URL into a cell and reference that cell in the IMAGE function.
Handling Errors in IMAGE Function
Excel returns a #VALUE! error under various circumstances, such as1
- Unsupported image formats.
- Non-string inputs for source or alt_text,
- Incorrect sizing values, or
- Incorrect height/width specifications.
Additionally, #CONNECT! and #BLOCKED! errors may occur due to internet connection issues or security settings.
Examples of the Excel IMAGE Function
Here are few examples of using the IMAGE function in Excel:
In this simple example, we are using the =IMAGE function to place a picture in a cell, and we are only using the source argument. The formula is as follows:

Here, the URL “https://excelguruji.in/wp-content/uploads/2023/09/EG-Logo-1.png” points to the image file.
When this formula is entered into a cell, Excel fetches the image from the specified URL and displays it directly within the cell, providing a quick and straightforward way to incorporate visual elements into your spreadsheet.
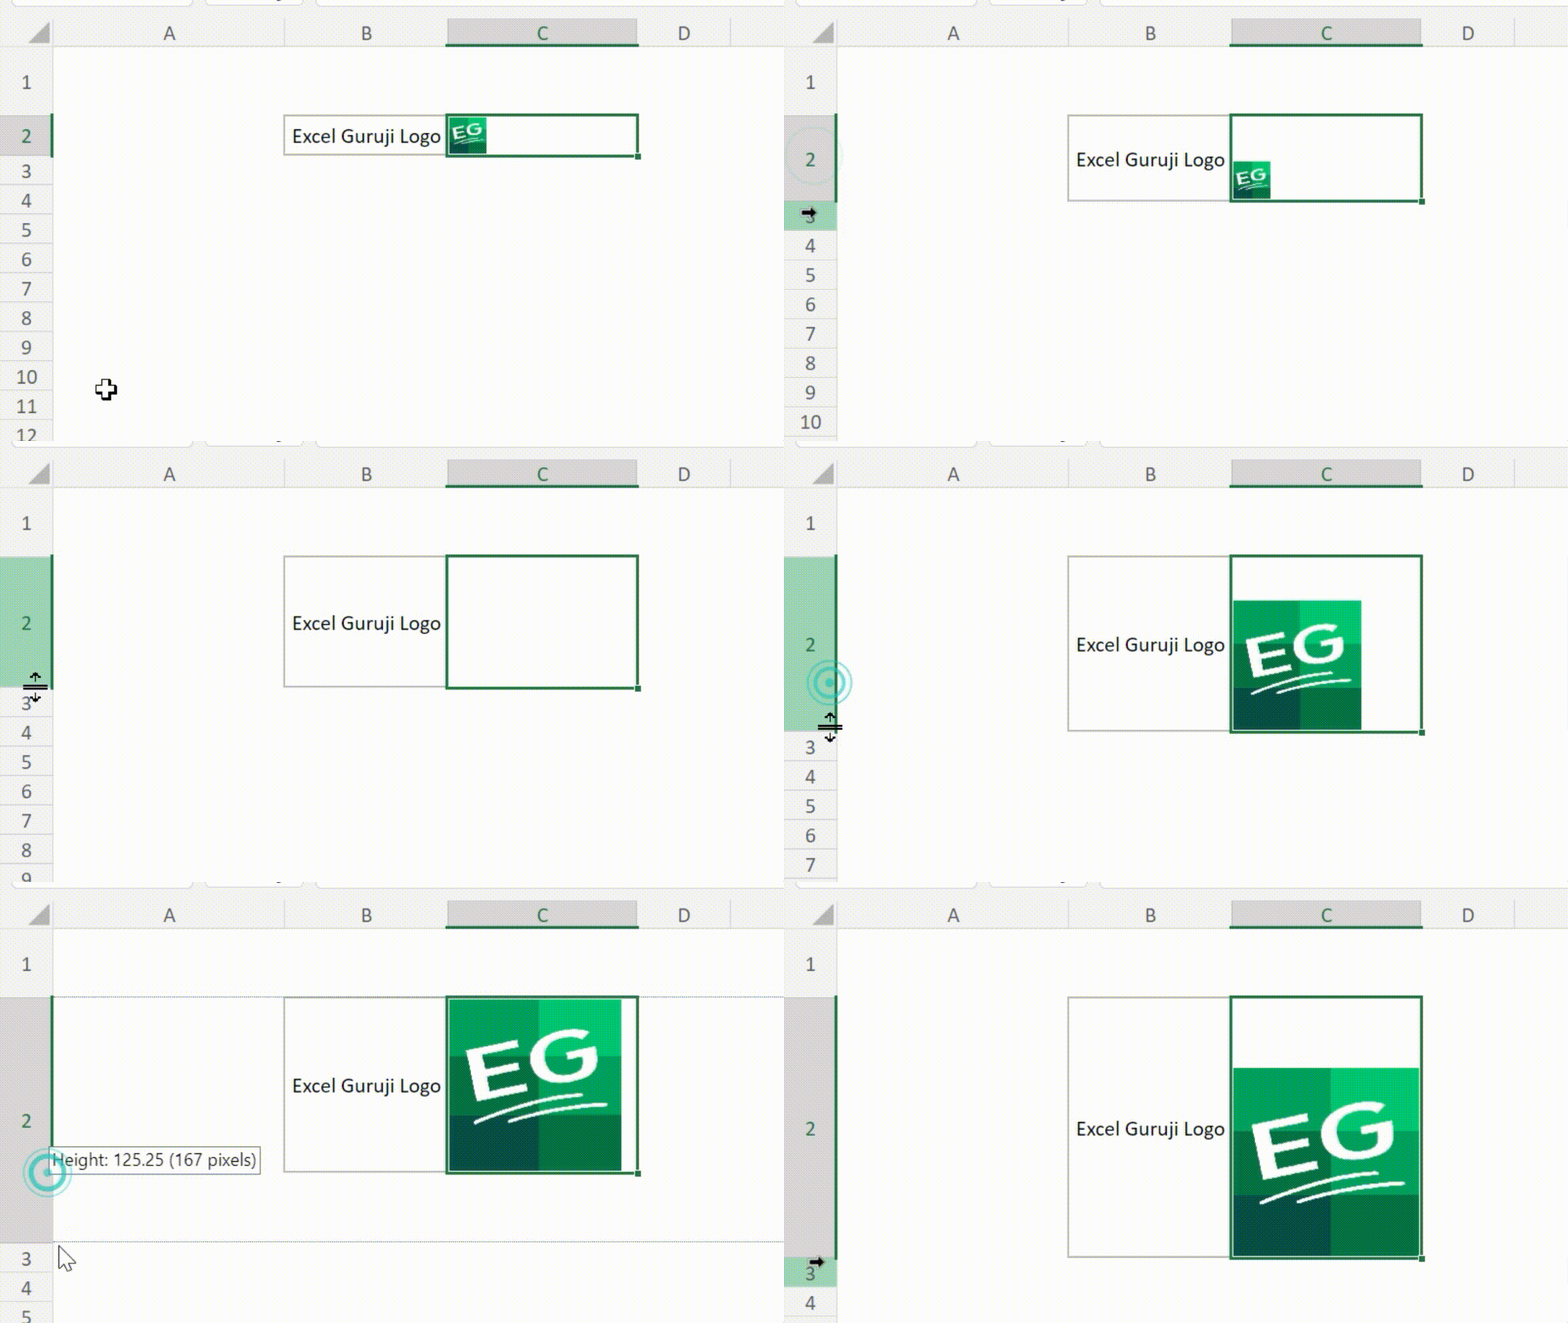
The image will retain its original aspect ratio when you change the cell size.

Now, let’s explore the impact by using the other arguments in the Excel IMAGE function’s syntax and observe the resulting effects

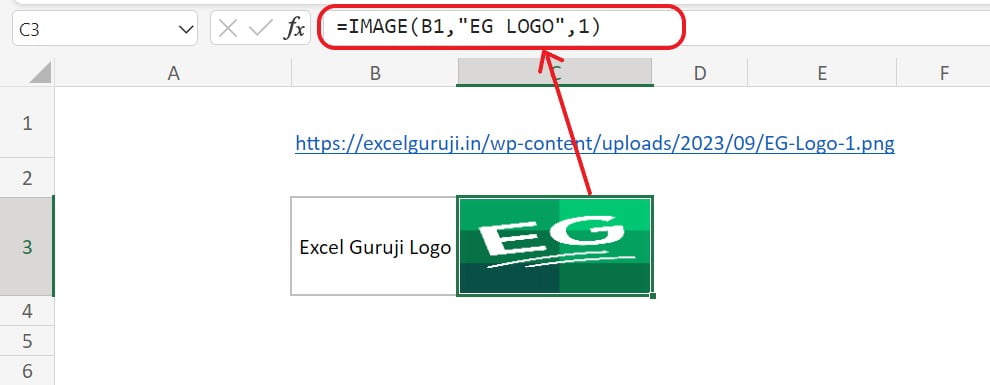
Let’s break down this formula: =IMAGE(B1, “EG LOGO”, 1)
- B1: This is the source argument, 5which contains the URL of the image: “https://excelguruji.in/wp-content/uploads/2023/09/EG-Logo-1.png”. This is the location from which the image will be fetched.
- “EG LOGO”: This is the alt_text argument, representing alternative text for the image. In this case, it is set to “EG LOGO,” which could be used for accessibility purposes or as a description for the image.
- 1: The sizing argument, where 1 signifies that the image should fill the entire cell, disregarding its original aspect ratio.

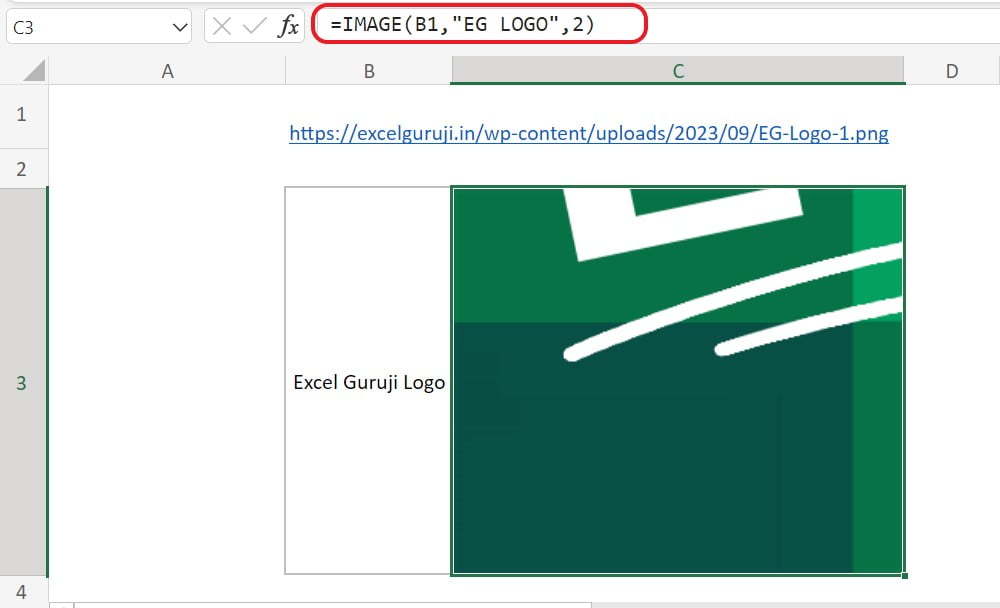
- 2: When using ‘2’ for sizing, it indicates that the image should maintain its original size, even if it exceeds the cell boundary.
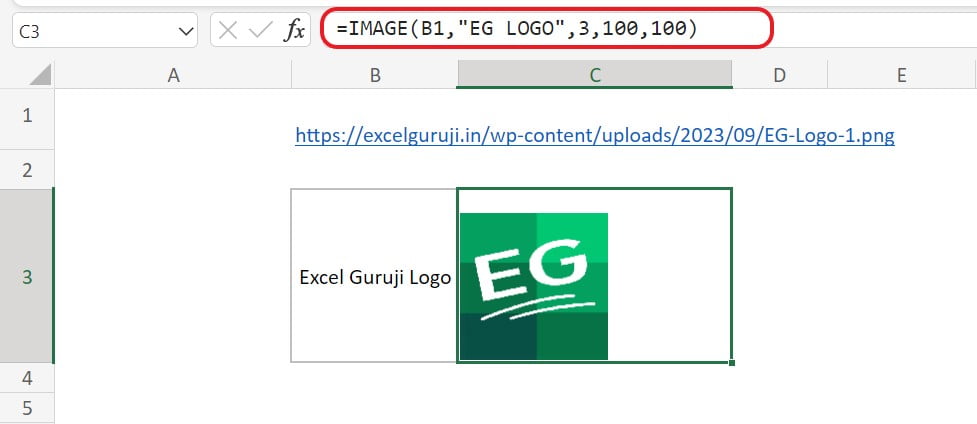
Now, when you set the sizing to ‘3’, you need to specify both the height and width arguments afterward or choose one of them, as demonstrated in the following example.

Even if you alter the size of the cells, the overall image will remain unaffected, which is a positive aspect.
Conclusion
The Excel IMAGE function is a powerful tool for integrating visual elements into your spreadsheets. Experiment with different sizing options, alternative text, and various image types to unleash the full potential of the IMAGE function.
Incorporate visuals into your Excel projects and transform your data into a more dynamic and impactful format.
Frequently Asked Questions (FAQs)
Q1: Can I resize the image using the IMAGE function?
A1: Yes, you can specify the height and width parameters to resize the image.
Q2: Can I use the IMAGE function to insert multiple images in the same worksheet?
A2: Yes, you can use the IMAGE function with different image_ids to insert multiple images in the same worksheet.
Q3: What file formats does the IMAGE function support?
A3: The IMAGE function supports various image file formats, including BMP, JPG/JPEG, PNG, GIF, TIFF, ICO, and WEBP (unsupported on Web and Android).
Q4: How do I handle errors like #VALUE!, #CONNECT!, and #BLOCKED! when using the IMAGE function?
A4: #VALUE! errors may occur for unsupported formats or incorrect parameters. #CONNECT! errors may indicate internet connection issues, and #BLOCKED! errors may be due to security settings. Refer to the documentation for troubleshooting tips.
Other Related Excel Functions
Mastering Excel VLOOKUP Function: A Comprehensive Guide to Enhance Your Data Analysis Skills
Mastering Excel LOOKUP Function: A Comprehensive Guide to Searching and Retrieving Data in Excel
Join me on Instagram, YouTube and WhatApp Channel for your daily dose of valuable tips and tricks! Catch insightful videos that will enhance your knowledge and skills. Don’t miss out – follow